
This article is more than 5 years old.
One of my goals for my first year is to do a complete refresh of all of the content in the Toolkit. In my role serving online students, I understand the power of video in teaching library tools and selling the library as the place to go for research assistance, technology training, and self-help. Having a digital space like the Toolkit–a centralized location for all of our video and other digital learning objects–is incredibly valuable for reaching students and faculty both on campus and online. However, when a space like the Toolkit starts to show its age, we risk losing a bit of credibility. For as much power as they have, videos quickly become outdated as web interfaces or link paths change. It’s also no secret that we’re bound by constraints on our time, so producing video of high production quality often takes a back seat, resulting in videos that look outdated before their time.
So, to help restore the Toolkit to its former glory and to put in place more sustainable workflows, I’ve started using Camtasia Studio to create what I hope are high-polish, ZSR-quality videos that will stand the test of time. I just finished my first one–a teaser video for Zotero–and wanted to share how I did it.
Scripting
With any video project, I find it’s much easier to get the audio down first and make it perfect before worrying about capturing video. I’m not one for improv, so that means writing a script first and paring it down to what’s really essential to get the message across. Our users don’t expect elaborate, drawn-out explanations; they’re watching the video because they hope it will save them time. If the content requires a video much longer than two minutes, it should probably be split into two separate videos. So to keep things brief, I scripted and timed myself rehearsing the script. I kept paring it down until I was comfortably under two minutes, and only then was it finally time to record.
Audio Recording

The scripting and audio recording take up the bulk of the time, but I’d argue that they’re the most important parts. Even the shiniest video will be ignored if there’s annoying background noise or if the speaker is rambling or talks too quickly or too quietly. I used Camtasia to record myself reading through the script twice three four times, then cut and spliced the best parts into the final audio track. So the video doesn’t feel quite so librarian-sitting-in-an-office-talking-at-you, I used a royalty-free guitar track that came packaged with Camtasia to add some interest.
Screen Recording
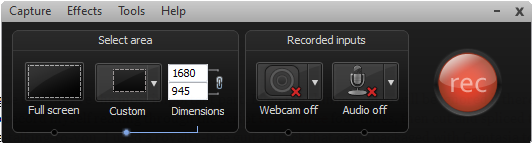
Now that I had the audio ready to go, it was pretty easy to record the screen. Screen capture is really what Camtasia was made to do, and it does it beautifully. All I had to do was mentally map out my mouse clicks, record a few run-throughs of each “scene,” and I was ready to edit.
I want to note here the significance of recording audio and video separately. One of the major weaknesses of using free, web-based screen recorders like Jing is that you can’t separate the audio from the video; that is, when something in your video changes, like a database interface, you have to re-record the entire video to bring your video up to date. By separating the audio and video, I can feasibly use the same audio track and only update those portions of the video that need updating, saving tons of effort in the long run.
Editing, Callouts, and Text
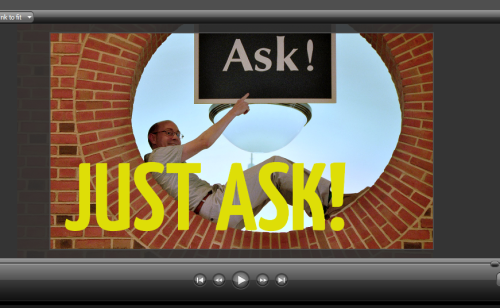
To bring everything together, I had to manipulate the video clips to match up with the audio. Because this particular video was more of a teaser and not intended to be a “how-to,” I sped up the video clips to keep everything flowing quickly. I focused the user’s attention with some appropriate zooming and panning, then added photos, text, and colored backgrounds when there was no video to display. You’ll notice I like big, bold text that’s readable even on the smallest smartphone screen.
Accessibility Concerns
Finally, to make the video accessible to those with hearing impairments and to those who might not have a pair of headphones in a quiet room, I added a caption track that the user can turn on and off in YouTube. Camtasia makes this almost absurdly easy: all I had to do was copy and paste my transcript into my project, then Camtasia guided me through time-stamping the caption track to sync with the audio.
Looking Ahead
I plan on working my way through the content on the Toolkit as determined by the needs of the online counseling program. I already have planned an entire series of Zotero tutorials, followed by tutorials for the PsycInfo and PubMed databases. If you have ideas for videos I can add to my queue, or if you have a special project in mind, I’m all ears. I hope you enjoy!
8 Comments on ‘New Video Efforts’
Great post and great video!
I need to brush up on these skills myself and create some new videos!
So great! Can’t wait for more! I have ideas!
This rocks!! It did not seem that nearly 2 full minutes had passed, which is a high mark IMO. 🙂
Very nice! It really hit the highlights. This sample will certainly inspire more ideas.
Thanks Kyle-my jaw dropped at hello!
Wow, my office is right beside a rock star!! I am completely amazed, outstanding work!! So glad you are at WFU, you make us look and sound good.
We’re talking Oscar here…
Makes me want to shimmy on over to Zotero.org. Great work!