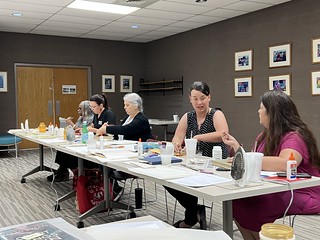
This spring, I spent a week traveling from east to west across North Carolina teaching book repair at public libraries. I visited libraries in Burgaw (Pender County), Burlington (Alamance County) and Shelby (Cleveland County). The attendees are always fun and their questions come tumbling out throughout the day. Public libraries have few resources and little training, so they are eager to learn. I enjoy these workshops very much and always meet the best people in out of the way towns in North Carolina. During the workshops, I can see that look on their faces sometimes, and they are saying to themselves….oh. I see! It is very rewarding to teach book repair.
I begin with tipping in a loose page. This is a simple and useful repair in which a thin bead of PVA adhesive is deposited in the joint where the page was attached. Align the formerly loose page with the text block, close the book, and place a weight on top, and the repair is done. Simple! I always teach this repair because there are always books with one loose page.
This is followed by using heat-set tissue to repair paper tears. Heat-set tissue is a thin tissue with a heat activated adhesive on one side. It can be applied over text with no loss of readability. It is on a waxed carrier sheet from which you peel off the tissue. The tissue can be torn to overlap and hold both sides of a tear, and is heated in place with a small travel iron. Heat-set tissue is also excellent for backing a fragile document. I used it a few years ago to stabilize our World War I posters.
Up next, is learning to tear and apply Japanese tissue. This kozo-based paper is thin but strong (kozo is in the Mulberry family). I use Sekishu, a medium-weight handmade paper. I demonstrate tearing it into a one-inch strip that is then glued out and applied to a broken joint in a book. The joint is in the beginning or end of a book, where the text block is joined to the cover. Japanese tissue can be used for an assortment of repairs such as backing a text block on a book to add strength and cover reattachment.
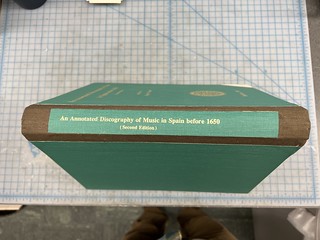
We also learn to create a spine replacement. For this exercise, we remove the existing spine, trim off any damaged material and glue it down to a piece of book cloth. A piece of bristol board (a thin, smooth board) glued to the reverse side serves as a spine stiffener. The cloth on the book covers is lifted so that the new spine piece can be attached to the book. This is a great repair, and one we do in Preservation almost daily.
There are several techniques that I demonstrate. These are: repairing damaged corners, repairing paperback books, and attaching a new endsheet. I also repair books brought by attendees from their home library.
It is a pleasure to teach these workshops, as the attendees are given the tools to return to their home library and continue making basic repairs.


6 Comments on ‘Spring Book Repair Workshops’
I always love reading about your traveling bookbinding experiences Craig! I know you are a gifted teacher and I can easily imagine the fun and excitement that takes place in your classes–like that “Oh, I see!” moment you describe. Kudos to you!
Once again crossing NC to help libraries care for their resources and extend their time on the shelf. Thank you, Craig, for your work and your post!
Thank you for sharing, Craig. This sounds like an interesting and engaging class. Great job!
It’s wonderful that you are able to travel across the state and share your expertise, Craig!
Thanks for sharing your expertise, Craig. I’m so glad that you have honed your talents so well, and share them so widely!
I love reading your repair posts, Craig! And Burgaw and its library are dear to me! (Too bad you were there prior to the awesome Blueberry Festival!)