
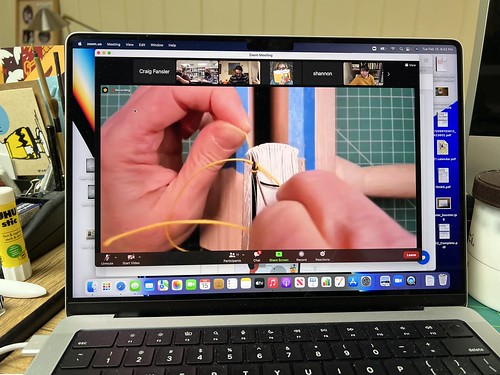
Four Tuesday nights in February, I spent a couple of hours in an online workshop called, Binding Fundamentals, taught by Karen Hanmer. I’d met Karen at Guild of Book Workers Seminars and knew of her work and teaching. She is an excellent teacher and has a great set up for online teaching. A week before our workshop, a package arrived with all of the materials for our binding.
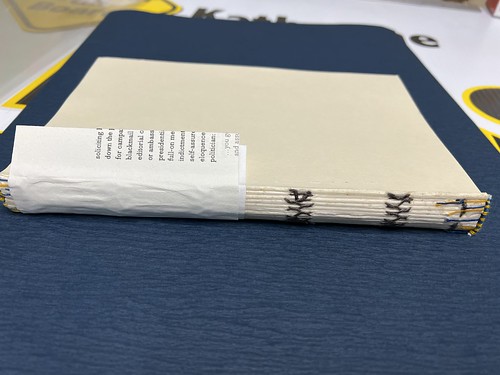
Sewn textblock with tyvek tabs under weights
During this workshop, we covered folding, marking up and punching signatures; sewing, gluing up the textblock and rounding the spine; backing the text block, sewing endbands and lining the spine. Several of these things I’d never attempted before as it doesn’t really come up often in preservation repairs.
We gathered 3 sheets of the textblock paper provided into signatures, and folded them into one gathering. After we had folded all of the pages into signatures, we had a loose textblock. We then marked the head and tail of the textblock. We folded the endsheets in half, and on the folded side, made a small fold, or hook. This hook serves as a good bond when it is glued under a signature. This is one of the things I’d never seen or done before.

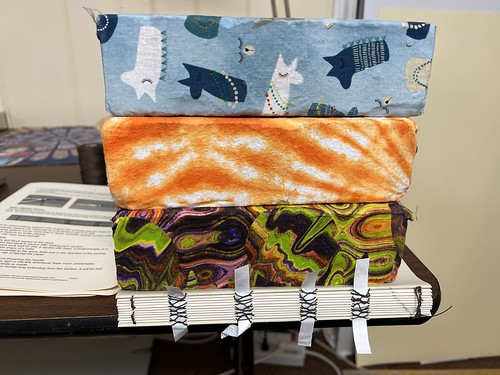
Sewn textblock with web liked stitching on spine
Sewing
Marking up is the process of deciding where the sewing stations are located. We used four thin, rectangular pieces of tyvek to sew over on the spine. This simulates sewing on cloth or leather bands in a more traditional binding. We measured the location of each tyvek piece on the spine. We then used a marked piece of paper as a template for the punching sewing locations of each signature. The sewing locations are grouped in two’s, and each set of sewing locations is linked together over the tyvek paper piece on the spine. The web linking stitch makes a sort of zig-zag pattern on the spine. The sewing was done with Irish linen thread.
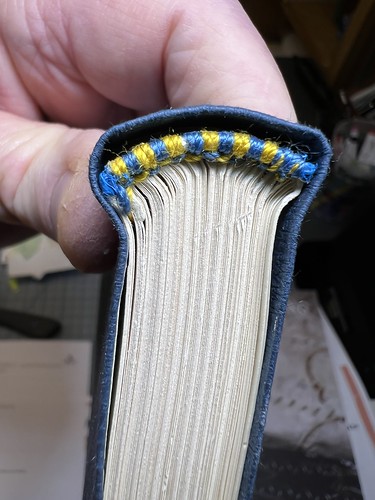
Endbands
Using 2 colors of silk thread and a core made up of a piece of Venetian blinds cord, I sewed endbands on the head and tail of the text block. Using two needles (one for each color of thread), the sewing is anchored on the spine of the books and wrapped around the core. Each time the color of thread changes at the top, it is wrapped twice around the core to create a pleasing pattern.

Rounded textblock in the press
Rounding
After the sewing was completed, we glued up the spine with PVA (polyvinyl acetate). PVA is a synthetic glue with a neutral pH. It dries quickly. After gluing up the spine, it is placed into a press. A bone folder is used to flatten and round the spine. Rounding is the process of delivering glancing blows on and across the spine to create a rounded spine using a backing hammer (or in my case a 10 penny hammer).
Backing
With the text block in the press, the text block is hammered gently until the edge of the text block makes a lip over the edge of the press. The hammering is done with the head of the hammer in your hand-the handle is not used. This helps prevent the hammer from decimating the paper and just shaping it. At this point, it also helps to add a little paste in order to soften the paper.
Spine Lining
The spine is lined with linen, followed by a second lining of paper. These two linings support the spine and give it strength, as well as, help in the attachment of the text block to the covers.

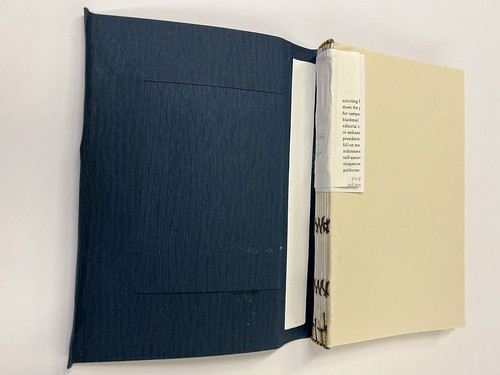
Paper Case
The paper case is made of a heavy weight paper and is similar to a limp binding (limp meaning no stiff boards added). Also, in this case we left a small excess paper on the fore edge of the book (the part where you open the book). This excess paper overhang is called a “Yapp” edge, named for the 19th Century British book binder William Yapp, who introduced the technique for pocket sized Bibles. The paper case was folded around the text block and glued.
14 Comments on ‘Bookbinding Fundamentals Workshop’
Loved reading about this online method of teaching (and learning)!
I love these posts from you Craig. Being an avid book collector I always find them so interesting. Thanks for this post.
Craig, thank you for this lovely post! The descriptions and beautiful photos and so engaging! I love learning more about these processes!
What a cool workshop, Craig! Thank you for sharing your bookbinding journey with us.
Another great post demonstrating just how unique and valuable your skillset is.
Craig, what a great post and I love the homage paid to the Ukrainian flag colors with the Endbands.
As I always say, you do have the best job ever!
This looks amazing!
This is super cool, Craig! This book nerd is in awe (and I appreciate handmade books even more now)! Thank you for sharing.
Thanks for sharing — tyvek tabs was a new one for me. I always used cotton tape back in the day. I loved the end bands. Did you use the Ukrainian flag colors on purpose?
It is an honor to know you, Craig! This is fabulous! Thanks for the great post and beautiful pictures.
Your book weights are so cute! Your sewing skills are so useful to your work, I love seeing what new skills you’ve picked up, Craig.
I enjoyed your post! There is so much technology and technique in book binding!
Craig, you embody the ethos that no matter how long you’ve been doing something, there are always new techniques and skills to learn! Thanks for sharing that with us!
SO COOL! Thanks for sharing this with us, Craig!!